The Repulsively Tantalizing Bugger Worm

by Jeremy Davies 

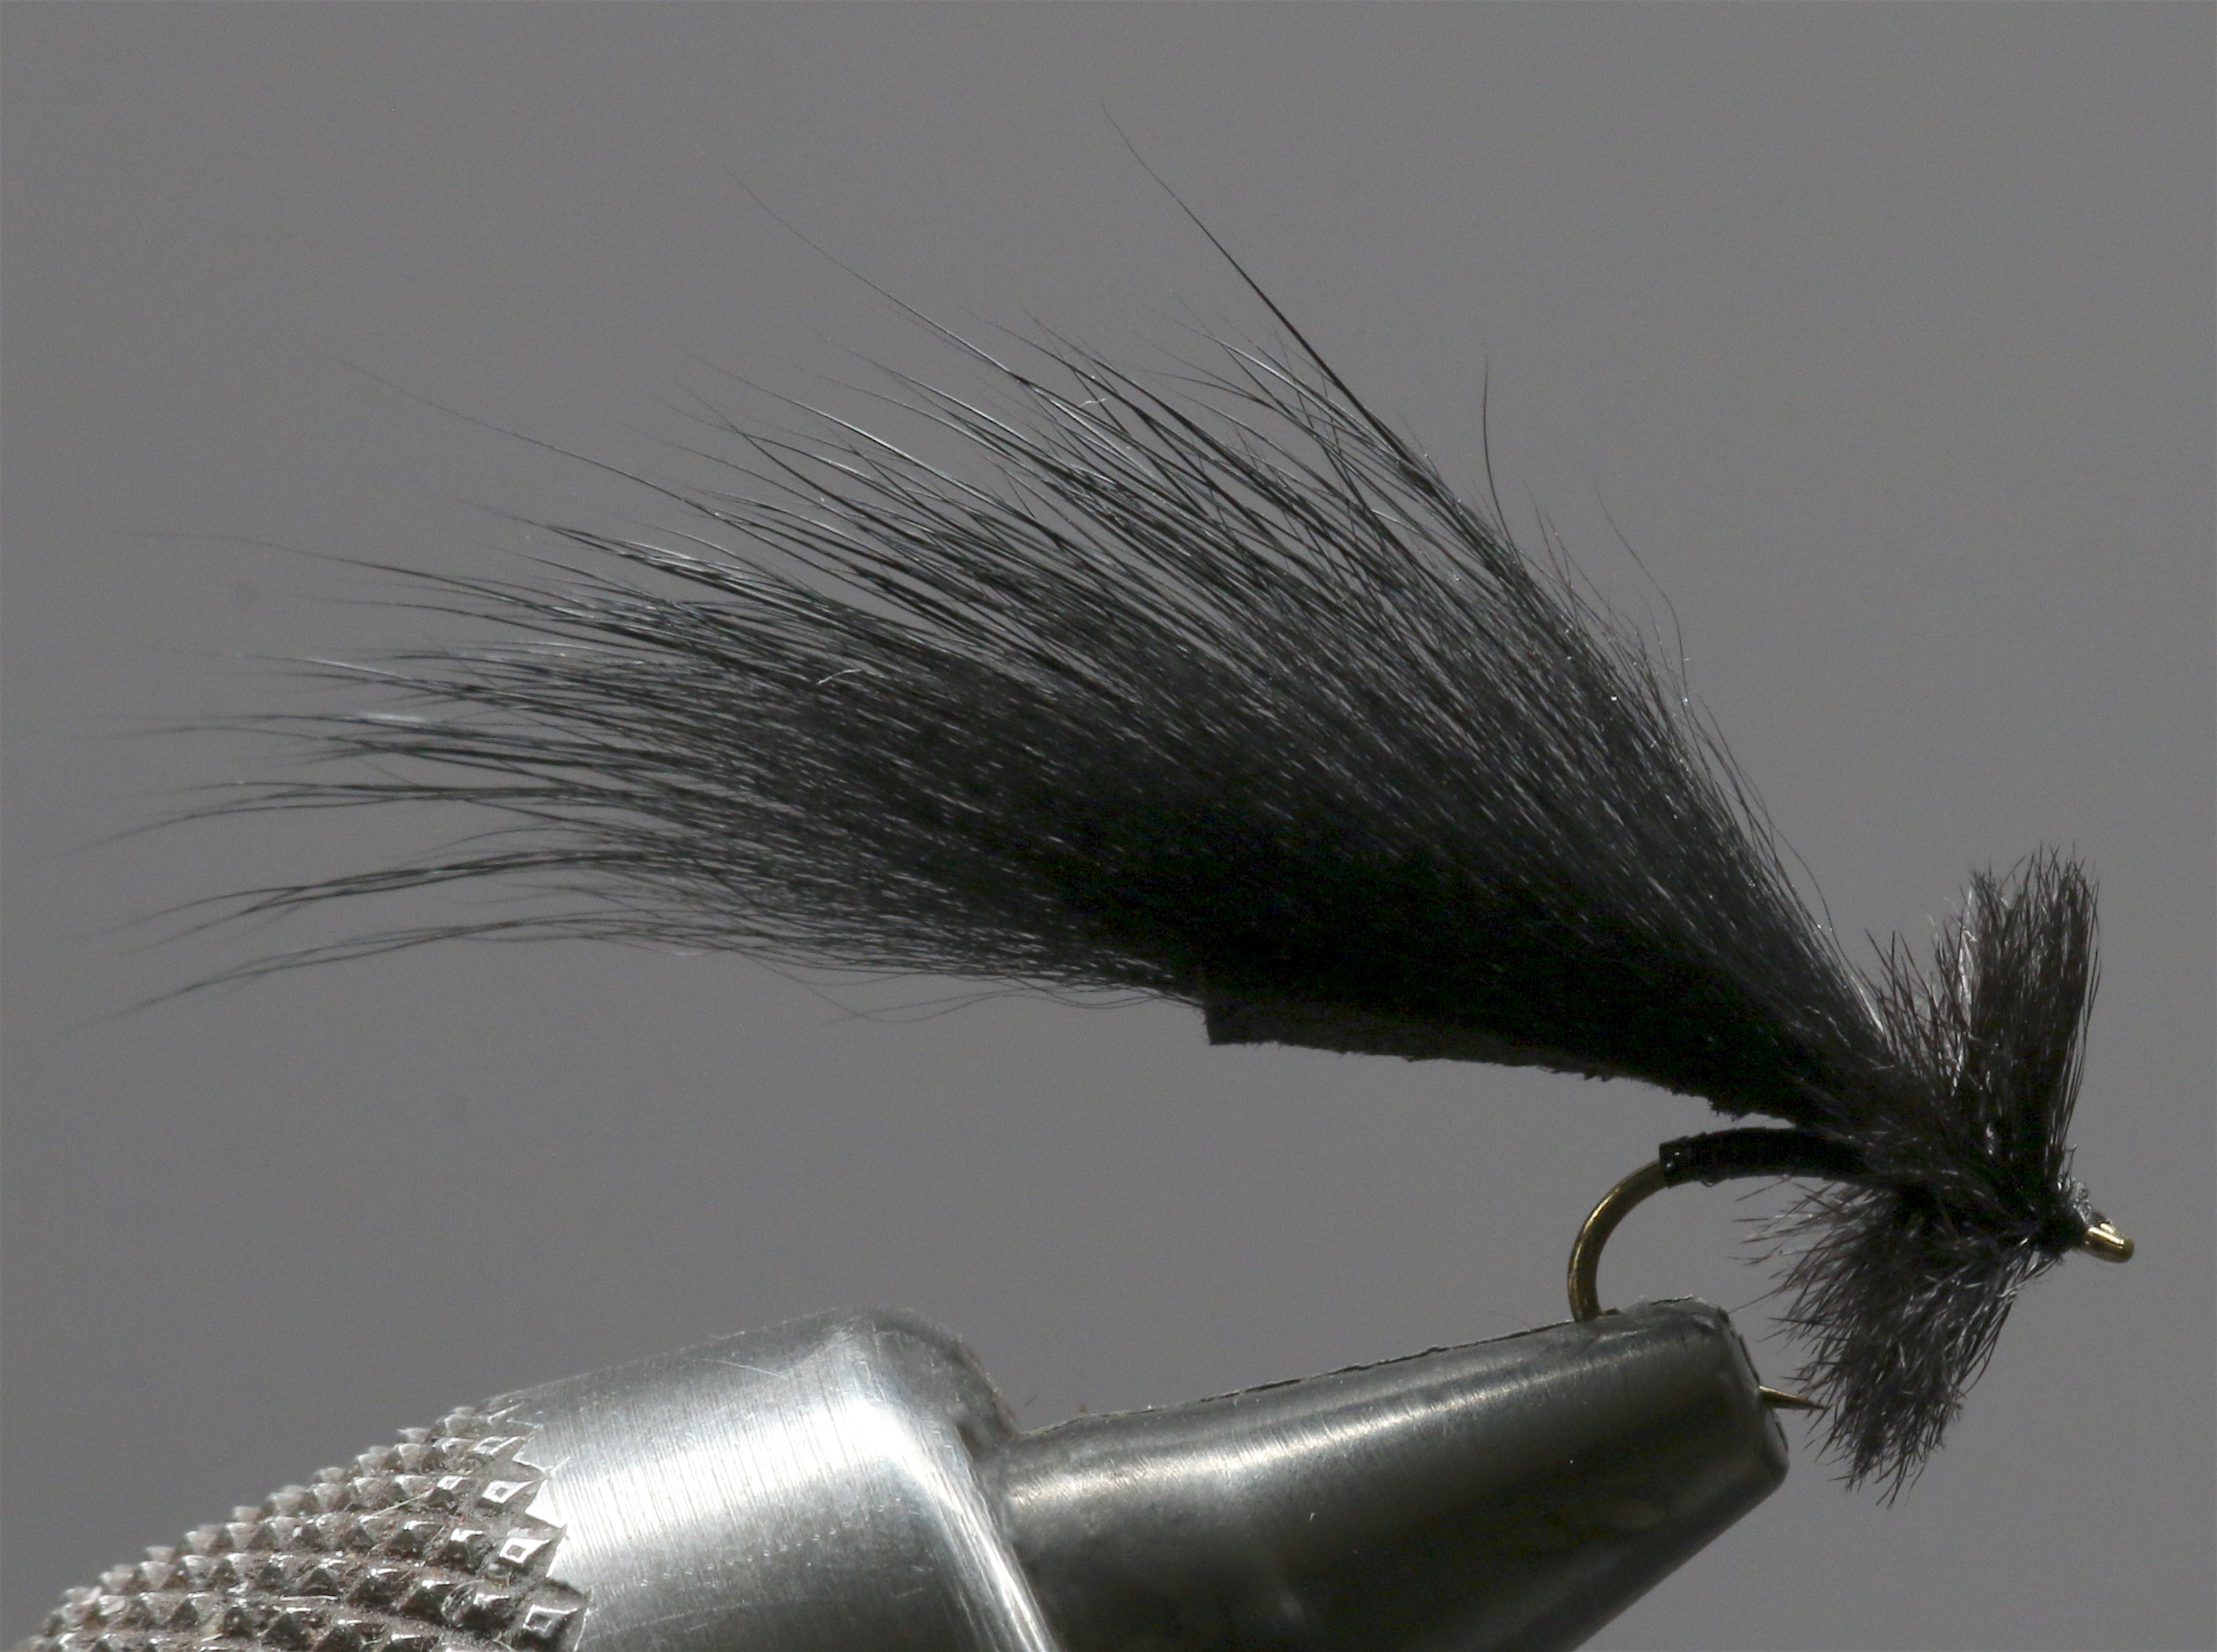
I have always been a big fan of both Woolly Buggers and San Juan Worms so a couple years ago I came up with the idea of combining them to create one interesting pattern. This fly has great action as it utilizes both marabou and squiggly or rubber legs. I tie it in sizes 8 to 12 and fish it either under an indicator or flipped and jigged in a pool or riffle.  The Bugger Worm in size 8 proved to be deadly on the Crowsnest River this past July fished in tandem with an Evil Weevil or Hare’s Ear Nymph. I also experimented in a few tiny creeks in runs that were less than six feet wide. The key was finding a suitable pool, tossing this fly in and jigging it with the rod tip. I used a size 10 in this case and made quick short roll casts into several pools and riffles. Dozens of brookies between seven and fourteen-inches long inhaled this little streamer. I also made a cast in a pool right under a bridge and hooked and lost a fish much larger. The fly also fooled a 20-inch brown on a much larger river. 

Unlike the Woolly Bugger, which has a marabou tail at the rear of the hook, this fly has marabou at the head of the fly as well as at the back. I tie this pattern in red or maroon as these are the most realistic worm colours. Start by putting a bead on a 3X long streamer hook and coating the entire length with lead to make certain the fly sinks. Then tie in the red marabou and legs at the head and bend of the hook. Tie in a length of red wire and chenille over the back half of the hook shank to be wrapped forward later. The next two steps are to tie in some red Uniflexx  in the middle of the hook shank, and marabou, red Uniflexx, and grizzly hackle behind the bead. Then wrap the chenille forward while making sure the legs stay in position in the middle of the body. Wrap the hackle firmly and carefully toward the back of the hook shank. Wrap the wire forward in order to secure both the chenille and hackle. 

 Jeremy’s Bugger Worm Recipe

Hook: 3X long streamer hook, #8-12 

Head: Bead, colour of your choice 

Weight: Lead wrapped over hook shank 

Body: Micro red chenille 

Hackle: Grizzly or black 

Tails: Red marabou 

Legs: Red UniFlexx 

Rib: Fine gold wire 

Removing Fly Line Twist

RIO–The fourth episode of season two of RIO’s “How To” series features RIO sales manager Zack Dalton explaining and demonstrating the difference between fly line twist, and line memory. In this film Zack describes how to avoid getting twist in a fly line in the first place, but also illustrates what to do to get rid of twist in a line if it happens. In addition, Zack talks about line memory and shows how easy it is to remove this from a RIO fly line. Zack’s tips are very neat indeed and well worth learning, and any angler that has ever had their fly line jam in the rod guides because of coils or twist, will find this film hugely beneficial.

Error getting video from vimeo API.

Friday Fly by…Mike Schmidt

The MR Simba, or Mad River Simba, is a fly thats been a long time coming. As with any fly I design, there was a specific purpose for both the flys profile and its action. I was looking for a fly that maintained a solid baitfish profile during quick stripping retrieves of the fly line, but fluttered enticingly during pauses or in lighter currents. I also wanted a fly that would work back to me with an erratic side-toside motion, or dig and jig through buckets or ledges when I dropped the rod tip. Early versions of the fly had less layering and synthetic materials. They fished well but compressed too much on the strip and did not maintain the intended profile. It was the boom in synthetic materials that transformed this fly to what it is today.   

MR Simba Recipe

Front Hook:  Gamakatsu B10S, size 1

Rear Hook:  Gamakatsu SP11-3L3H, size 2

Thread:  Danville, 140 denier

Connection:  Beadalon, 19-strand .018” with one 6mm bead

Tail:  Marabou

Body 1:  UV Polar Chenille

Body 2:  Schlappen

Body 3:  Barred Fly Enhancer Legs, rubber

Body 4:  Marabou

Body 5:  Ripple Ice Fiber

Head 1:  Senyo Laser Dub

Head 2:  Flymen Fishing Co. Fish Skull, medium

Eye:  3/16” Holographic Epoxy eyes, Super Pearl

Tying Steps:

  1. Place the Gamakatsu SP11-3L3H hook level in the vise and attach the thread mid-shank. Secure a single tan marabou plume extending a full hook-length off the back of the hook. Trim the butt section of the feather and tightly wrap down the cut section to the top of the shank. Finish with your thread at the rear of the shank, directly above the barb of the hook. 
  2. At the rear tie-in point secure the Copper UV Polar Chenille with a few tight thread wraps, ensuring that the fibres of the chenille point towards the rear. Then prepare a yellow schlappen feather by stroking the fibres back to reveal the stem, starting an inch or so down from the tip. Tie in the feather by that stem, at the same point as the UV Polar Chenille, with the fibres cupping the shank (bottom of the feather towards the shank). Carefully palmer the two materials together up the shank to the eye of the hook, then bind them down with a few thread wraps and cut the excess. 
  3. Just behind the eye of the hook tie in two barred Fly Enhancer legs on each side of the shank. Tie them in at the midpoint in the rubber, to ensure they cannot easily pull out. Then reverse down the other side of the shank and secure. The legs should extend past the bend of the hook to a point about halfway between the bend of the hook and the tip of the tail. Finish the rear hook by tying in a single tan Marabou plume over the top of the shank that extends just past the bend of the hook. Clip the excess and form a small thread head before whip finishing. 
  4. The connection is made with a single three-inch piece of 19-strand .018” Beadalon. Place the Gamakatsu B10S hook level in the vise, start the thread at the eye, and alternate wraps back to the rear of the shank forming a ribbing over the metal.  Slide the rear hook onto the wire, then bring the wire ends together and slide on a single 6mm bead. The connection is completed by tight, crossing wraps of thread, with the wire being tied down side-by-side along the top of the hook shank.
  5. At the rear tie-in point tie in a tan and a yellow marabou plume. Start with the tan plume on top of the shank with the tips extending approximately to the rear of the rear hook shank. Cut the centre stem out of the yellow plume, so it is less likely to foul, then tie in that feather on the bottom of the hook shank with the tips extending just slightly less than the tan. At the same point repeat step two and palmer forward four wraps. 
  6. Tie in two barred Fly Enhancer legs down each side of the shank.  Tie them in on one side of the shank at the midpoint in the rubber, then reverse down the other side of the shank and secure. The legs should extend approximately to the rear hook point.  Tie in a pinch of copper Ripple Ice Fiber on top of the hook shank and yellow Ripple Ice Fiber on the bottom of the shank. The tips of the Ripple Ice Fiber should extend about to the bend of the rear hook. 
  7. Tie in a single tan marabou feather as a topping, with the tips extending about to the hook point of the rear hook. Then apply Senyo Laser Dub. First tie in a small amount of burnt orange down each cheek. Then tie in a pinch of tan on top of the hook shank and yellow on the bottom of the hook shank. Tie in both with tight wraps of thread over the middle of the bunch and then whip finish right over those wraps, with half of the Laser Dub still out over the eyes. 
  8. The Laser Dub now acts as a platform for the Fish Skull. Carefully reverse the Laser Dub back over itself and slide on the medium Coppertone Fish Skull to ensure the eye of the hook is fully exposed. Hold the Laser dub in place as you slide the Skull back off of the hook, place a dab of Loctite Gel just behind the hook eye, then in one motion quickly slide the Fish Skull back on until the eye is fully exposed. Finish the fly with a small dab of Loctite Gel in each recessed eye socket and place a 3/16” Holographic Super Pearl eye in each.  Hold firmly between your fingers for about ten seconds to ensure a good bond. 

The Love of Lodges

Among the many “institutions” in our sport – those things that are inherently connected to it, like fly shops, fly-fishing guides, fly-fishing towns, fly-fishing literature and art – one of my favourites is the fly-fishing lodge.

by Jim McLennan (artwork by Cody Richardson Creations)

Read More

Gear Review: Headgate Tippet Holder XL by fishpond

It may have been fast-food restaurants that originally figured out how to improve on perfection—simply super-size it. Fishpond capitalized on this concept with their industry-leading tippet holder. The Headgate XL is an enlarged version of the popular Headgate tippet holder and utilizes many of the features that make the regular size model such a success. Like the smaller version, the XL uses a spring-loaded hinge so it’s easy to add and remove tippet spools. The XL also includes two rubber gaskets to ensure spools stay secure. The XL can hold up to five four-inch spools (or 13 regular spools).  

Gear Reviews: Ultralite MXT by Hardy

Hardy has a rich tradition and proven track record for making outstanding fly rods and reels. The Ultralite MXT takes advantage of Hardy’s solid foundation, yet pushes forward in an innovative direction. Perhaps most notable about the reel is that the MXT is six to eight percent lighter than an all-aluminum version. Hardy designers accomplished this weight reduction by making a high modulus carbon fibre back-plate an integral part of the reel. The MXT also has a smooth, strong disc drag system that’s easily controlled by a colour-coded regulator. It’s tough not to turn heads when you create an innovative reel that’s light in the hand. Click here to check out the Ultralite MXT.

Gear Review: Wraptr Boots by Korkers

Of all gear in the fly angler’s arsenal, it’s safe to say wading boots receive the greatest amount of abuse. Anglers expect boots to support them on the crazy hike into the canyon and then keep them upright on the slick rocks once they get there. Perhaps a boot’s greatest attribute besides comfort is the ability to endure this constant abuse. Enter Korkers’ newest boot, the Wraptr. The innovative exterior construction features a one-piece, single-seam, abrasion-resistant engineered skin. Innovative and durable construction, extreme comfort, fast drying material, and internal drainage channels are the reasons the Korkers Wraptr turned the Fly Fusion testers’ heads this year.  

Gear Review: fishpond’s New Thunderhead Submersible Backpack

A few Fly Fusion staff members have been fishing with fishpond backpacks for a number of years now, so when fishpond developed a fully waterproof backpack the crew was excited to test them out. They found the pack remains comfortable even after lengthy use and also found the pack has the right fastening points in all the right places, which made essential tools (like forceps) easily accessible. The pack also has adjustable gear straps for an extra rod tube, which can be positioned on the side that makes the most sense for an individual’s casting stroke. Testers also noted that they appreciated the interior zippered pocket and the clear stash pocket to help with gear organization. Aside from the fishy elements that make this a fantastic gear bag, designers also included an adjustable hip belt to ensure the different sized anglers will feel like the pack was created for them. All that, in addition to fishpond’s commitment to environmental forward thinking, makes this pack a great buy. Click here to check them out.

Midges on the Mind

The Griffith’s Gnat is likely the most popular midge pattern, but for fly anglers who appreciate variety, the Stuck Shuck Midge is another pattern diminutive pattern that’s sure to produce huge results.

Stuck Shuck Midge (photo a recipe provided by Scott Erickson)

Hook: Daiichi 1640, #20

Thread: Black, 45 denier

Shuck: Opalescent twisted Mylar

Abdomen: Working thread

Rib: Pale-yellow 70 denier thread

Thorax: Black mole fur/synthetic blend