Stellar Stillwater Performer–The Titan Tube Midge 

by Landon Mayer

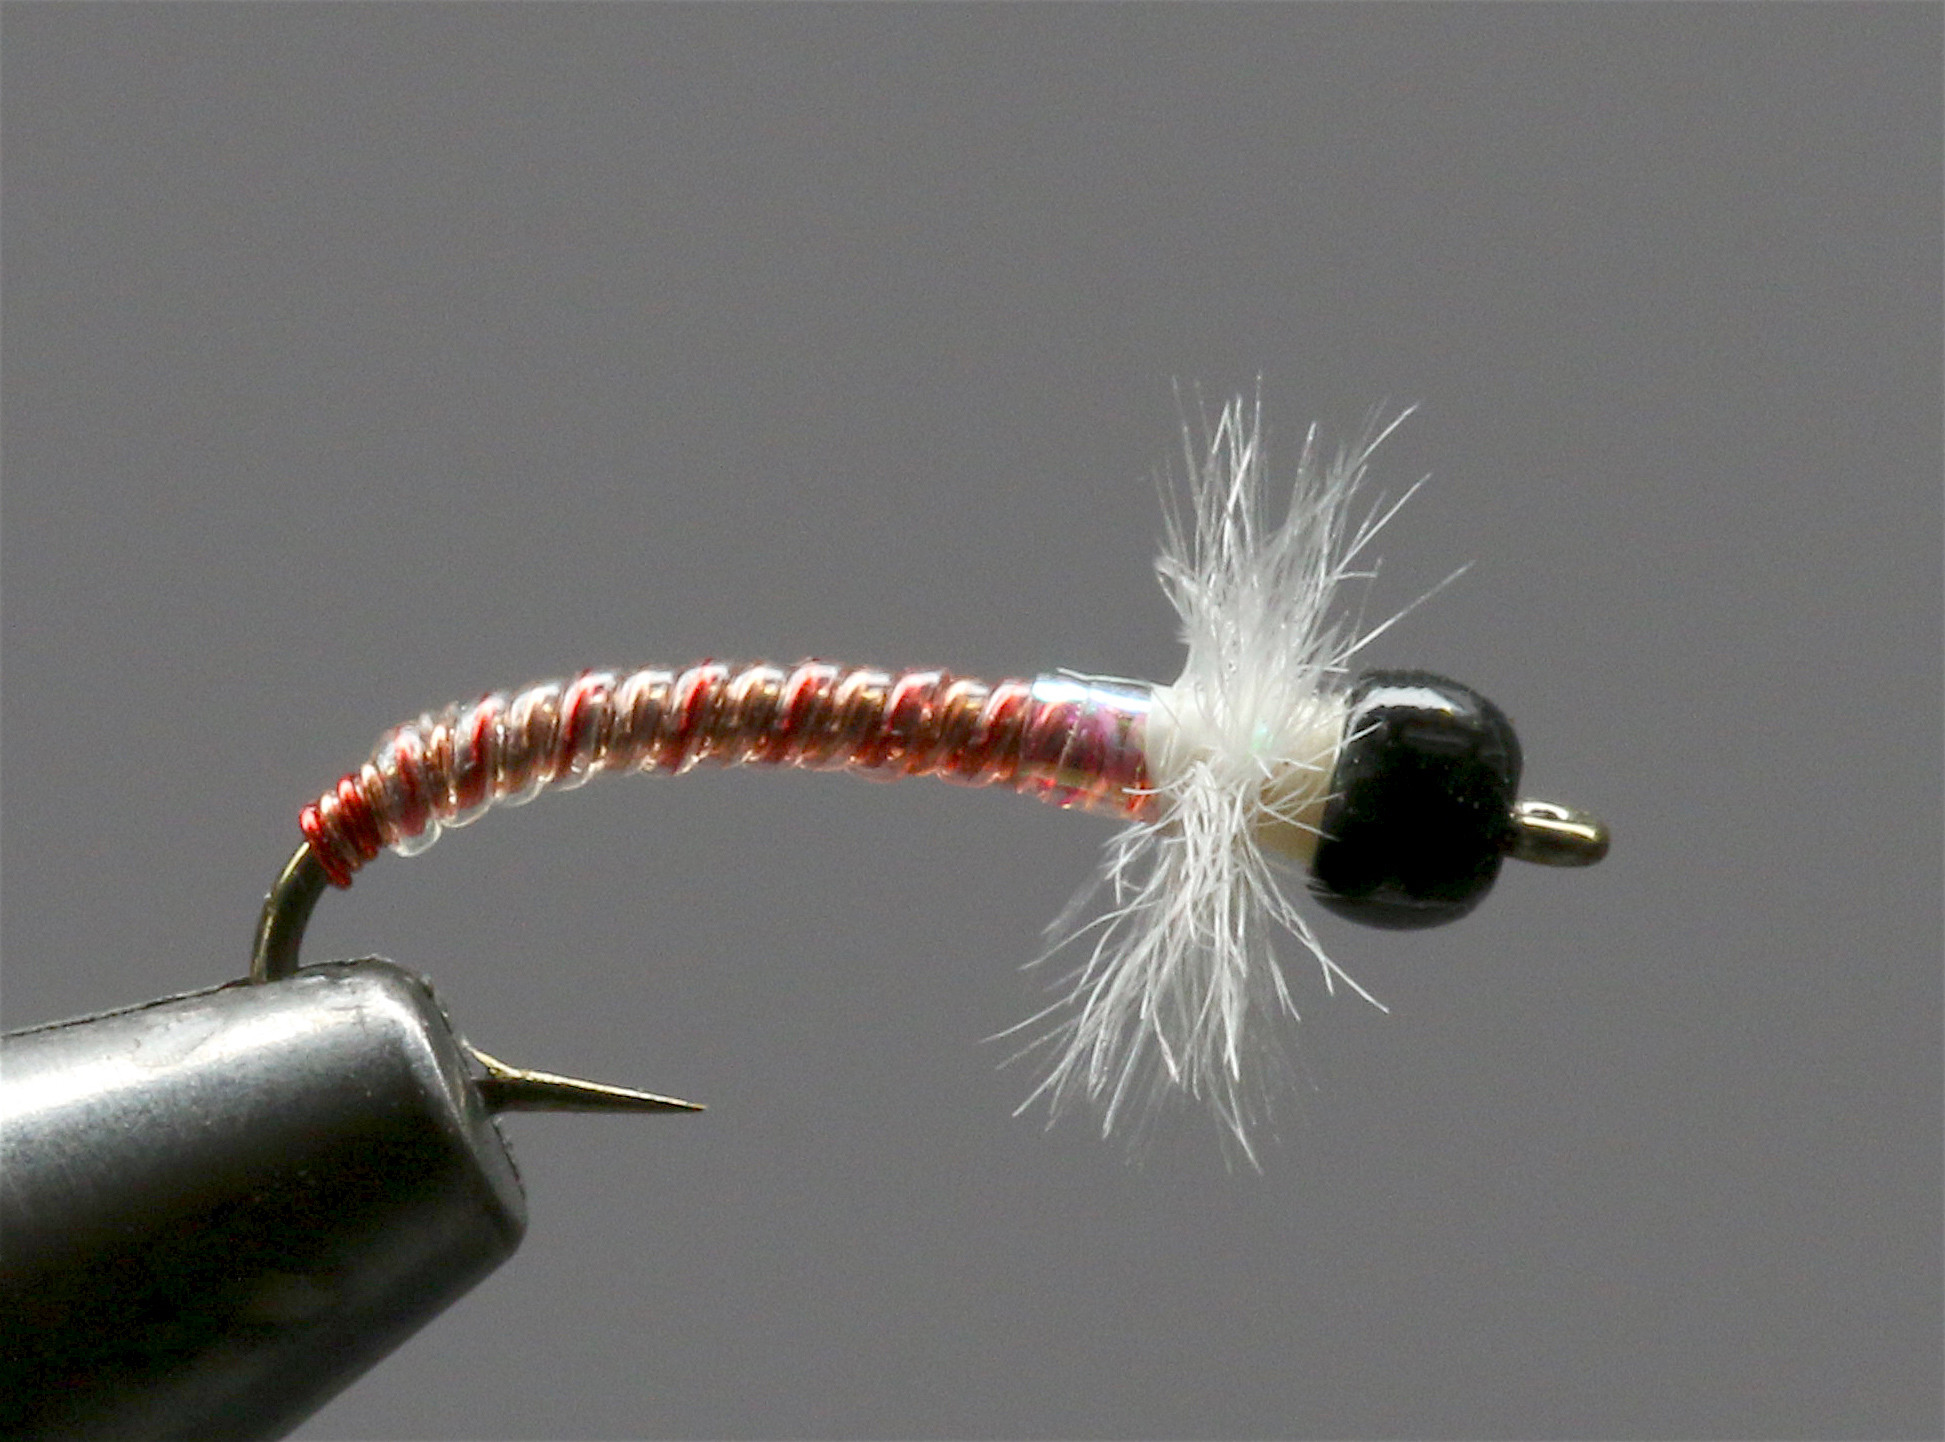
The Titan is the giant of the Tube Midge family, meant to represent Chironomids, one of the most important food supplies in any stillwater. The Titan is larger – ranging from #12 to #16, and has two pieces of small coloured wire inserted into clear Micro Tubing and three wraps of two coloured wires at the bend of the hook to secure. This allows it to look like a slim body inside a clear case. Unlike other chironomid imitations the white in this tie is not a bead, but white ostrich wrapped three times around the thorax and secured by white 8/0 Uni-Thread. A single wrap of tinsel behind adds a hint of flash. The ostrich moves like the gills on a natural and attracts cruising giants to the fly.  

Chironomids in still water are on the move. When I set up a rig I always keep that in mind. One of my favourite ways to maximize movement in a fly is by using a non-slip mono loop knot. This allows the fly to move naturally and encourages the fish to react and strike. In addition to movement I believe in removing anything unnatural from my rig to prevent making the fish wary. This is why the tungsten bead works well – it’s a lot of weight in a small package. 

If I’m using a single fly set-up I typically use a 9 foot, 3X fluorocarbon leader connected to the fly with a non-slip loop knot. This is a favourite when using a slow finger-over-finger retrieve. But I often use two- or three-fly rigs. In shallow water I typically use two flies to prevent snags and have a better chance of landing trout that go into the weeds. In deep water I prefer to cover more water depths with three flies to find out where the trout are feeding. When building a two-fly rig, I attach a two-to-three foot piece of 3X or 4X fluorocarbon tippet using a triple surgeons knot, leaving six-to-eight inch tag ends. When the knot is complete I cut off one of the tags and connect the fly to the other tag with a non-slip loop knot. The second fly is then attached to the long end using the same knot. With a three-fly rig I repeat the same process with a second piece of 3X or 4X fluorocarbon and connect the second fly to the short tag end off the surgeons knot, then attach the third fly to the final long tag end. The advantage to the flies on short tag end with an anchor fly below is maximum movement whether the rig is hanging still, bouncing in chop, or being retrieved with strips or twitches. The final ingredient is a large, medium, or small, clear or white Thingamabobber indicator to suspend the flies. If I am casting longer distances I use an orange Thingamabobber to improve visibility.   


Tips for Fishing Mayer’s Mini Leech

by Landon Mayer

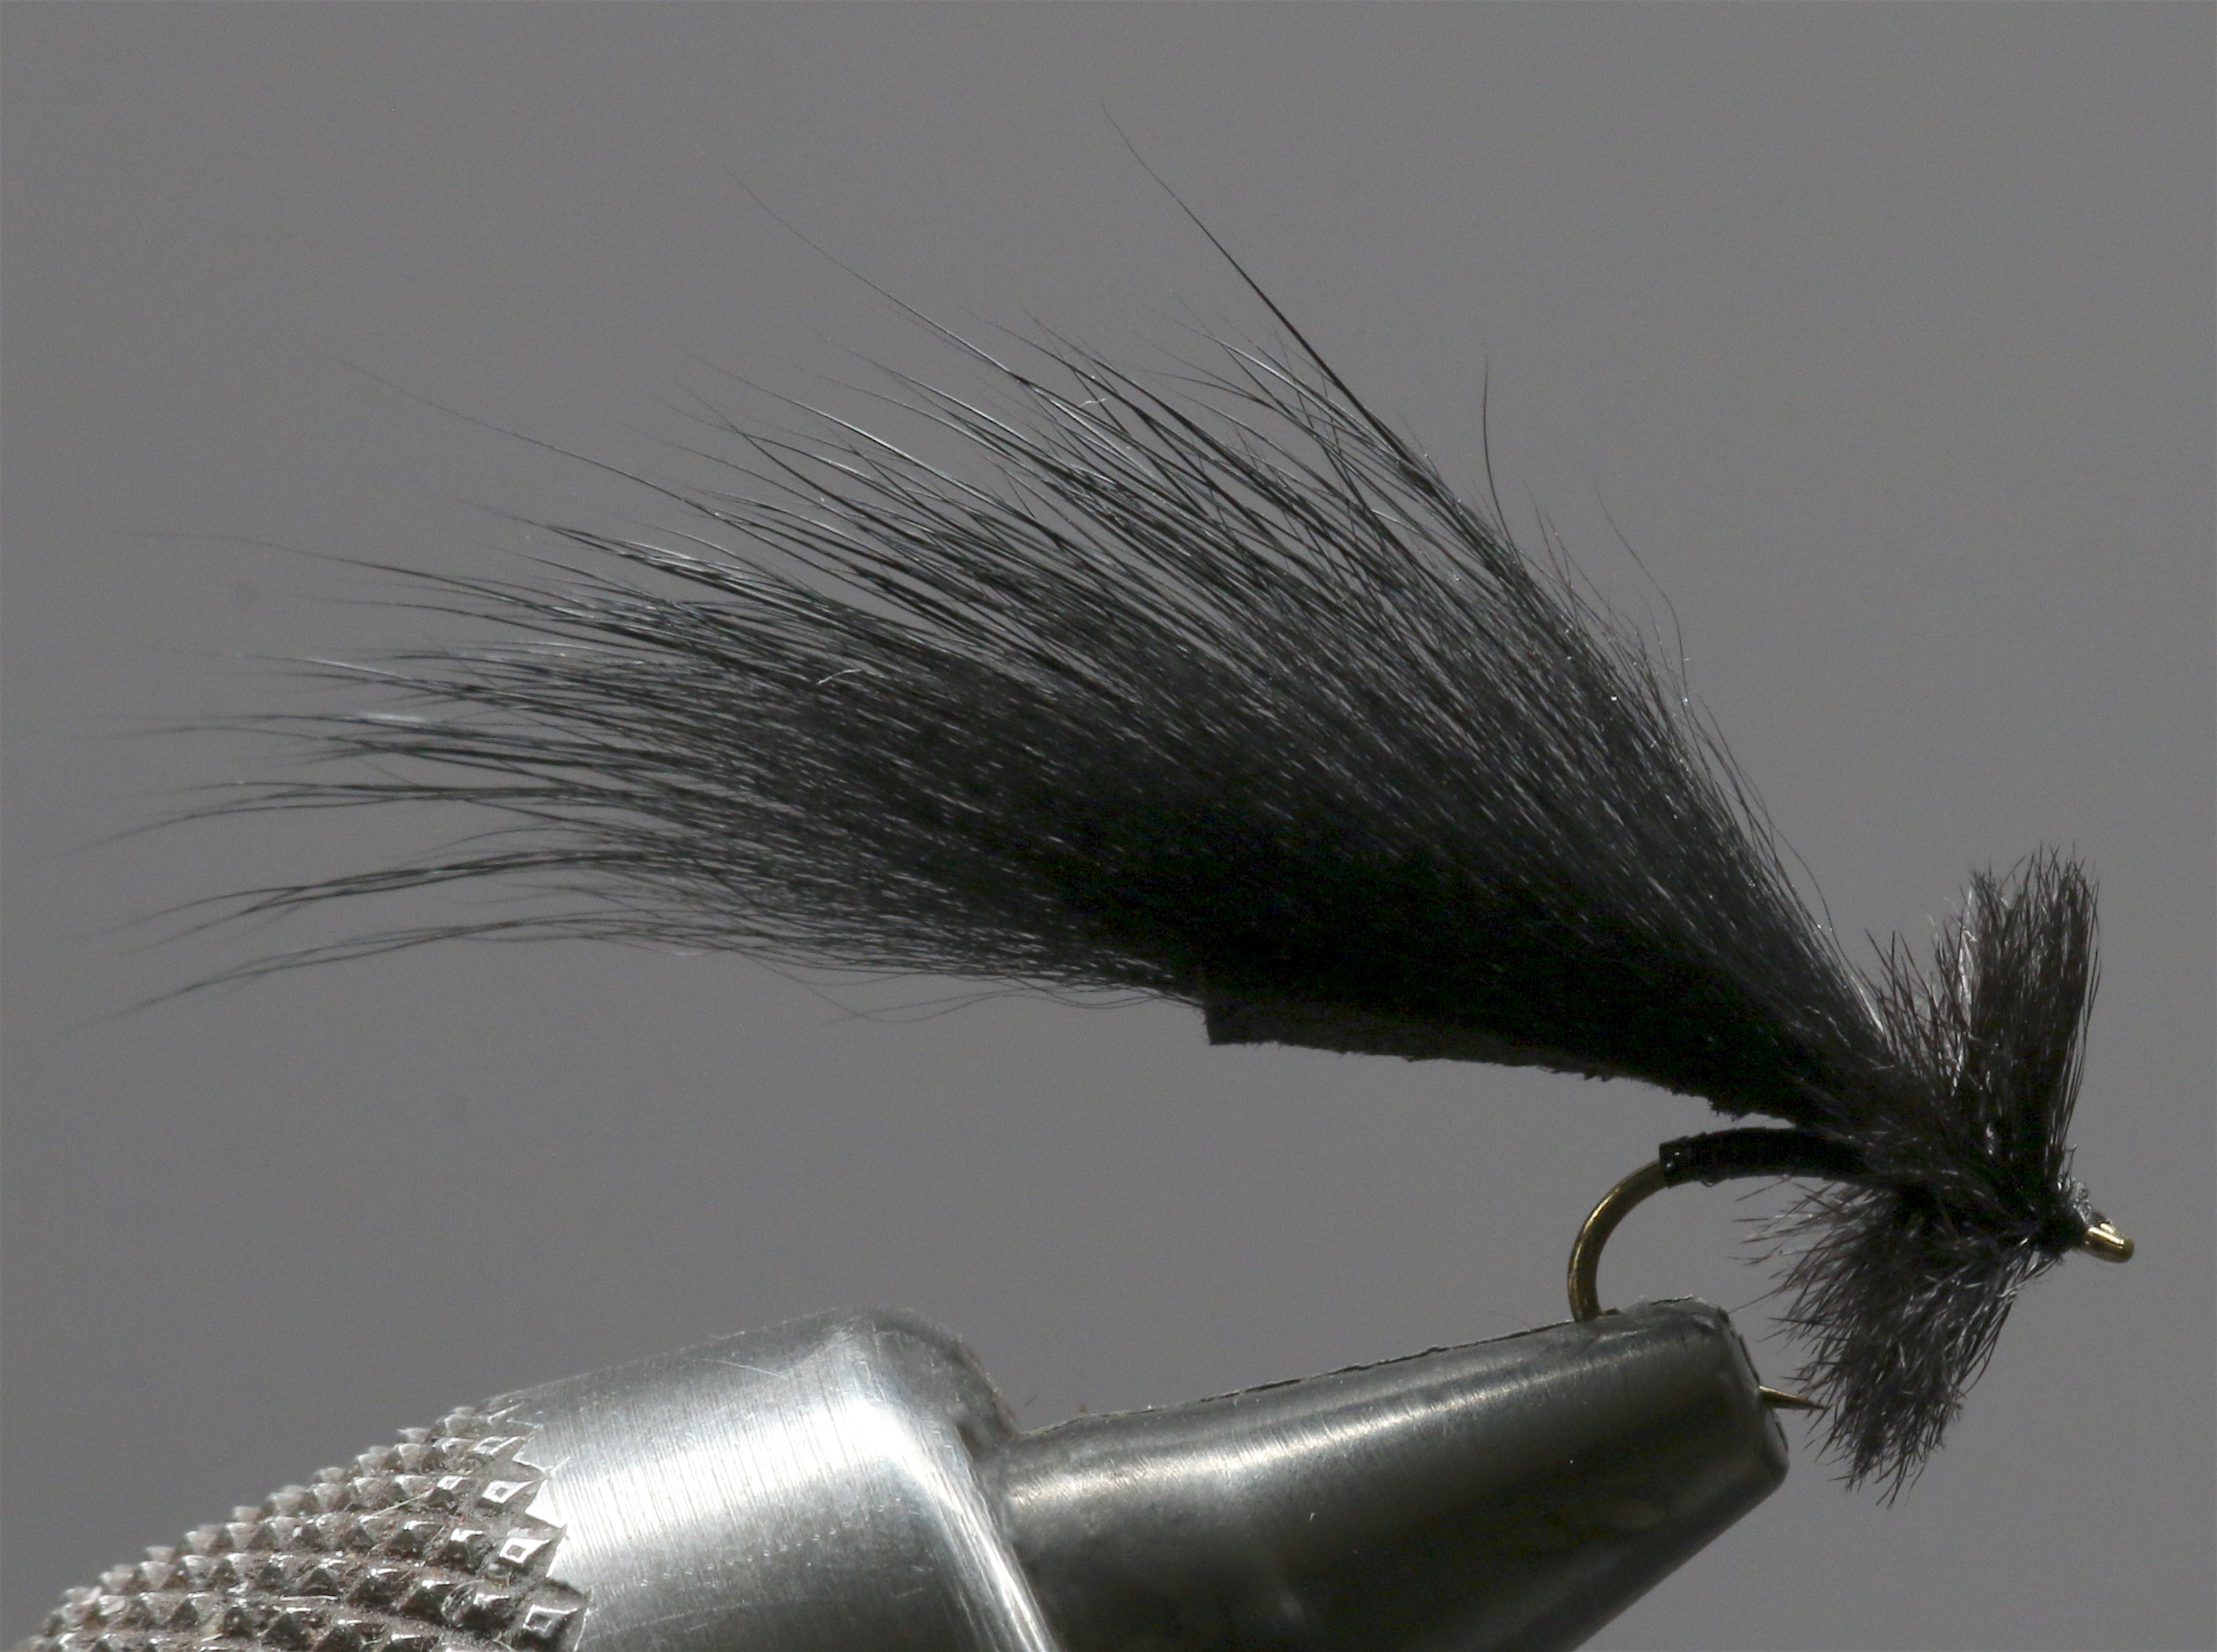
Leeches are an important part of a trout’s diet, especially in high water conditions. Similar to worms, leeches are swept off the river’s edge and bottom, supplying an easy food for the fish. While some leeches are large, exceeding one inch, there are many that are less than an inch long, making the common two-inch leech patterns un-productive in many circumstances. I designed the Mayer’s Mini Leech to match the small freshwater leeches that trout feed on in freestone rivers, tailwater streams, and stillwaters. With micro pine squirrel attached only near the eye of the Tiemco 2488 #14 or16 hook, the extending material constantly moves as does the ostrich herl collar. A Krystal Flash body adds a little shine as the fly drifts and wiggles.  

This fly is also versatile. You can dead drift it like a nymph, swing it as a nymph, trail it behind a larger streamer using a stripping retrieve, or even hang it below a hopper. The constant pulsating and undulating action matched with the tapered profile of a real leech will fool many trout, bass, and carp. It is my go-to pattern for landing large trout in the tight quarters of undercut banks, around structure, and at the heads of drop offs or riffled runs.  

What makes this design universal is its ability to match so many food supplies other than just leeches. Use it in a ginger colour to match dead, floating flesh in the salmon-rich waters of Alaska. Use it in olive, rust, brown or tan to mimic drifting vegetation that is packed with bugs or crustaceans. Finally, in natural colour it can match the darting fry and baitfish along the river’s and reservoir’s edges.   

When nymphing the Mini Leech I prefer to connect this fly either with a tag end from a triple surgeons knot as the lead fly and trail a second fly off the remaining tag end, or as a trailing fly when connected to the second piece of tippet attached at the bend of the hook on the first fly. The first fly is weighted and the trailing leech is unweighted to maximize movement. As part of a hopper-copper-dropper set-up that good friend and mentor John Barr developed, I replace the last fly with a leech. This allows the trailing leech to swing and wiggle while the large dry gets the trout’s, attention. In skinny water I simply drop the leech off the bend of the hopper hook using a two-foot piece of tippet and placing a micro-shot six inches above the leech to keep the leech itself free of weight, which maximizes movement. 

I also like to fish the Mini Leech with a streamer. I attach the leech in front of a large streamer by tying a piece of 0X tippet to the bend of the leech and tying the streamer to that. I prefer this rig when I know I will be retrieving the flies. This makes it appear that a biatfish is chasing a leech, which can really turn on big trout. If I am going to dead drift my streamer or retrieve it slowly with pauses, I reverse the fly’s positions, attaching the streamer to the tippet and tying the leech to a piece of 0X or 1X that’s tied to the bend of the streamer hook.  

Tying the Brookie Wart

by Jeremy Davies

This past spring and early summer I fished many streams that were loaded with small brook trout. Unlike many anglers, I really enjoy fishing for brookies as I believe they are the most beautiful trout and can be caught when the more cagy brown and rainbow trout are not cooperating. Most of the streams that I fished exhibited two main properties: they had a lot of woody “trash” on the bottom which made nymphing with an indicator tough, and had few if any fish rising. The best strategy was to carefully flip a relatively heavy fly near a likely spot and strip it in. I fished an especially pretty little creek in late July ,and an Olive Brookie Wart in size 12 worked very well. Most of the brookies were six to ten inches long and could easily ambush and inhale this little streamer. I also had good luck in several other small streams for browns, brookies, and even a few bull trout and whitefish. 

The Brookie Wart is very simple to tie if you can get your head around how tiny it is. Use a 2X long nymph hook in sizes 10 or 12 and tie in some micro lead eyes at the head. Then take some Wooley Bugger Marabou and make a tail about the length of the hook shank. Next tie in some hackle and rubber legs right behind the lead eyes. Then dub the body with Light Peacock Arizona Dubbing and wrap the hackle toward the bend as the wire is wrapped forward to secure the hackle. If you are fishing this fly in deeper water you may want to wrap the front half of the body with lead so it will get near the bottom. 

Brookie Wart Recipe

Hook: 2X long nymph hook, #10-12 

Thread: Black or olive Uni-Thread, 8/0 

Head: Micro eyes, brass or lead 

Body: Light Peacock Arizona Dubbing 

Hackle: Grizzly or black 

Rib: Fine gold wire 

Legs: Uni-Flexx, dark brown or black 

Tail: Olive marabou, Krystal Flash (optional) 


Modernizing the Mickey Finn

by Jeremy Davies

The Mickey Finn is one of my favourite brown-trout streamers because it is easy to tie and has yellow in it, which is a colour that seems to attract these wily trout. I have never been one to settle on a pattern if I feel I can make it more effective. The standard Mickey Finn relies on the angler to give it enticing action via a quick retrieve. I wanted to adapt the pattern to have more built-in action. Over the past two or three seasons I have been exchanging the standard bucktail on the original Mickey Finn for the more “juicy” or lifelike marabou. I tried this streamer in May of 2016. It was a cloudy drizzly day which made me hopeful that big brown trout would cooperate. On my third cast in a deeper run a large brown chased my fly but wasn’t hooked. I kept peppering the run with casts and eventually I hit paydirt as a 19-inch brown crushed this fly and jumped 18 inches in the air before slipping into the net. Over the next three hours I landed several more good fish. 

The Marabou Mickey is like a marabou hybrid of a Mickey Finn and a Matuka. The first step is to place a bead on the hook, which can be gold, red, or even black. I first tie in some yellow marabou and a few strands of Krystal flash to form the tail. The next step is really a threefold sequence of dubbing the body with Minnow Body Ice Dub and tying in the marabou on top of the body to form the wings. After you have tied in three yellow marabou wings, make one more wing out of red marabou to give it the colour of the standard Mickey Finn. Then dub a little more Ice Dub behind the bead and tie off. 

Marabou Mickey Recipe:

Hook: 3X long streamer hook, # 8-12 

Thread: 8/0 Uni-Thread, black or tan 

Weight: Lead (optional) 

Head: Bead in gold, red or black 

Body: Ice Dub Minnow Belly 

Wings: Yellow and red marabou 

Tail: Yellow marabou with Krystal Flash 

No Visibility No Problem: The Ultra Bright Leech

by Jeremy Davies 

      Anglers must deal with the reality that the streams they most cherish will not always be in prime condition with clear and low flows. Runoff and periodic rainy periods often produce high and murky fishing conditions. Fishing can be both difficult and easy, depending on our approach. The high water can make wading difficult even on smaller streams, and the trout’s visibility is greatly reduced. The key is to take a disadvantage and turn it into an advantage. This lower visibility can make trout less wary and more vulnerable to highly visible flies. I have had success in these conditions with both buggers and leeches, however bright, flashy streamers can yield even more success during these conditions. This past June I fished several streams during high water conditions. One small stream had less than a foot of visibility. I gently flicked this fly into a deep pool where another little creek emptied in and immediately a 12 inch brookie pounced on it. Over the next 20 minutes I caught seven or eight brookies, including a 16-inch whopper that had no earthly business being in a creek that tiny. I also had some luck on other streams under similar conditions. Fish were not rising to attractor dries, but this flashy streamer was being chased a lot. I landed a number of good cutthroats, along with a 17-inch bull trout. The great thing about fishing this time a year is that few other people are doing it, and you can have most sections of stream to yourself. The trout are there, you just have to go after them. 

The main purpose of the Ultra Brite Leech is to attract attention during poor water conditions. This pattern is typically tied on a 3X long streamer hook in sizes 8 to 12.  First put a gold or nickel-silver bead or cone on the hook and layer the first half of the hook shank with lead. Tie in a tail of white marabou with three or four strands of Krystal Flash poking through. You may also want to cover the front half of the hook shank with lead if you need to get this fly down really deep. Make the body by dubbing the Ice Dub and laying three side wings with Krystal Flash until you reach the bead. Making the Krystal Flash collar is perhaps the most difficult part of constructing this fly. Take four clumps of Krystal Flash and tie one on top, one on the bottom and one on each side. Pull tightly and spin the Krystal Flash a bit until it creates a reasonable-looking collar, then trim both the collar and side wings to neaten the fly. To complete the fly take a small amount of ice dub and apply behind the bead. 

Recipe

Hook: 3X long streamer hook, #8-12 

Thread: Uni-Thread 8/0, black or tan 

Weight: Lead (optional) 

Body: Ice Dub Minnow Body 

Side Wings: Krystal Flash 

Collar: Krystal Flash 

Tail: White marabou with Krystal Flash 


The Repulsively Tantalizing Bugger Worm

by Jeremy Davies 

I have always been a big fan of both Woolly Buggers and San Juan Worms so a couple years ago I came up with the idea of combining them to create one interesting pattern. This fly has great action as it utilizes both marabou and squiggly or rubber legs. I tie it in sizes 8 to 12 and fish it either under an indicator or flipped and jigged in a pool or riffle.  The Bugger Worm in size 8 proved to be deadly on the Crowsnest River this past July fished in tandem with an Evil Weevil or Hare’s Ear Nymph. I also experimented in a few tiny creeks in runs that were less than six feet wide. The key was finding a suitable pool, tossing this fly in and jigging it with the rod tip. I used a size 10 in this case and made quick short roll casts into several pools and riffles. Dozens of brookies between seven and fourteen-inches long inhaled this little streamer. I also made a cast in a pool right under a bridge and hooked and lost a fish much larger. The fly also fooled a 20-inch brown on a much larger river. 

Unlike the Woolly Bugger, which has a marabou tail at the rear of the hook, this fly has marabou at the head of the fly as well as at the back. I tie this pattern in red or maroon as these are the most realistic worm colours. Start by putting a bead on a 3X long streamer hook and coating the entire length with lead to make certain the fly sinks. Then tie in the red marabou and legs at the head and bend of the hook. Tie in a length of red wire and chenille over the back half of the hook shank to be wrapped forward later. The next two steps are to tie in some red Uniflexx  in the middle of the hook shank, and marabou, red Uniflexx, and grizzly hackle behind the bead. Then wrap the chenille forward while making sure the legs stay in position in the middle of the body. Wrap the hackle firmly and carefully toward the back of the hook shank. Wrap the wire forward in order to secure both the chenille and hackle. 

 Jeremy’s Bugger Worm Recipe

Hook: 3X long streamer hook, #8-12 

Head: Bead, colour of your choice 

Weight: Lead wrapped over hook shank 

Body: Micro red chenille 

Hackle: Grizzly or black 

Tails: Red marabou 

Legs: Red UniFlexx 

Rib: Fine gold wire 

Friday Fly by…Mike Schmidt

The MR Simba, or Mad River Simba, is a fly thats been a long time coming. As with any fly I design, there was a specific purpose for both the flys profile and its action. I was looking for a fly that maintained a solid baitfish profile during quick stripping retrieves of the fly line, but fluttered enticingly during pauses or in lighter currents. I also wanted a fly that would work back to me with an erratic side-toside motion, or dig and jig through buckets or ledges when I dropped the rod tip. Early versions of the fly had less layering and synthetic materials. They fished well but compressed too much on the strip and did not maintain the intended profile. It was the boom in synthetic materials that transformed this fly to what it is today.   

MR Simba Recipe

Front Hook:  Gamakatsu B10S, size 1

Rear Hook:  Gamakatsu SP11-3L3H, size 2

Thread:  Danville, 140 denier

Connection:  Beadalon, 19-strand .018” with one 6mm bead

Tail:  Marabou

Body 1:  UV Polar Chenille

Body 2:  Schlappen

Body 3:  Barred Fly Enhancer Legs, rubber

Body 4:  Marabou

Body 5:  Ripple Ice Fiber

Head 1:  Senyo Laser Dub

Head 2:  Flymen Fishing Co. Fish Skull, medium

Eye:  3/16” Holographic Epoxy eyes, Super Pearl

Tying Steps:

  1. Place the Gamakatsu SP11-3L3H hook level in the vise and attach the thread mid-shank. Secure a single tan marabou plume extending a full hook-length off the back of the hook. Trim the butt section of the feather and tightly wrap down the cut section to the top of the shank. Finish with your thread at the rear of the shank, directly above the barb of the hook. 
  2. At the rear tie-in point secure the Copper UV Polar Chenille with a few tight thread wraps, ensuring that the fibres of the chenille point towards the rear. Then prepare a yellow schlappen feather by stroking the fibres back to reveal the stem, starting an inch or so down from the tip. Tie in the feather by that stem, at the same point as the UV Polar Chenille, with the fibres cupping the shank (bottom of the feather towards the shank). Carefully palmer the two materials together up the shank to the eye of the hook, then bind them down with a few thread wraps and cut the excess. 
  3. Just behind the eye of the hook tie in two barred Fly Enhancer legs on each side of the shank. Tie them in at the midpoint in the rubber, to ensure they cannot easily pull out. Then reverse down the other side of the shank and secure. The legs should extend past the bend of the hook to a point about halfway between the bend of the hook and the tip of the tail. Finish the rear hook by tying in a single tan Marabou plume over the top of the shank that extends just past the bend of the hook. Clip the excess and form a small thread head before whip finishing. 
  4. The connection is made with a single three-inch piece of 19-strand .018” Beadalon. Place the Gamakatsu B10S hook level in the vise, start the thread at the eye, and alternate wraps back to the rear of the shank forming a ribbing over the metal.  Slide the rear hook onto the wire, then bring the wire ends together and slide on a single 6mm bead. The connection is completed by tight, crossing wraps of thread, with the wire being tied down side-by-side along the top of the hook shank.
  5. At the rear tie-in point tie in a tan and a yellow marabou plume. Start with the tan plume on top of the shank with the tips extending approximately to the rear of the rear hook shank. Cut the centre stem out of the yellow plume, so it is less likely to foul, then tie in that feather on the bottom of the hook shank with the tips extending just slightly less than the tan. At the same point repeat step two and palmer forward four wraps. 
  6. Tie in two barred Fly Enhancer legs down each side of the shank.  Tie them in on one side of the shank at the midpoint in the rubber, then reverse down the other side of the shank and secure. The legs should extend approximately to the rear hook point.  Tie in a pinch of copper Ripple Ice Fiber on top of the hook shank and yellow Ripple Ice Fiber on the bottom of the shank. The tips of the Ripple Ice Fiber should extend about to the bend of the rear hook. 
  7. Tie in a single tan marabou feather as a topping, with the tips extending about to the hook point of the rear hook. Then apply Senyo Laser Dub. First tie in a small amount of burnt orange down each cheek. Then tie in a pinch of tan on top of the hook shank and yellow on the bottom of the hook shank. Tie in both with tight wraps of thread over the middle of the bunch and then whip finish right over those wraps, with half of the Laser Dub still out over the eyes. 
  8. The Laser Dub now acts as a platform for the Fish Skull. Carefully reverse the Laser Dub back over itself and slide on the medium Coppertone Fish Skull to ensure the eye of the hook is fully exposed. Hold the Laser dub in place as you slide the Skull back off of the hook, place a dab of Loctite Gel just behind the hook eye, then in one motion quickly slide the Fish Skull back on until the eye is fully exposed. Finish the fly with a small dab of Loctite Gel in each recessed eye socket and place a 3/16” Holographic Super Pearl eye in each.  Hold firmly between your fingers for about ten seconds to ensure a good bond. 

Midges on the Mind

The Griffith’s Gnat is likely the most popular midge pattern, but for fly anglers who appreciate variety, the Stuck Shuck Midge is another pattern diminutive pattern that’s sure to produce huge results.

Stuck Shuck Midge (photo a recipe provided by Scott Erickson)

Hook: Daiichi 1640, #20

Thread: Black, 45 denier

Shuck: Opalescent twisted Mylar

Abdomen: Working thread

Rib: Pale-yellow 70 denier thread

Thorax: Black mole fur/synthetic blend

Friday Fly By…Mike Schmidt

The great thing about big streamers is that, because of their bulk, it doesn’t take too long to fill up an average sized fly box. The tough thing about streamers is that it’s easy to lose a bunch over the course of the day. Here’s the Junk Yard Dog to help deal with the loss.

Junk Yard Dog Recipe:

Thread: UTC140 denier, brown

Back Hook: Gamakatsu SP11 3L3H size 1

Front Hook: Gamakatsu B10S size 2/0

Tail: Marabou, tan

Body 1: Polar Chenille, UV Copper

Body 2: Marabou, tan

Body 3: Arctic fox tail, rusty brown

Body 4: Arctic fox tail, dark tan

Head: Senyo Laser Dub, dark tan

Eyes: 8mm Clear Cure Dumbbell eyes, steel

Connector: Beadalon, 19 strand .018″


STEP ONE:  With the back hook in the vise, start the thread and wrap it to about mid-shank. Secure a single marabou feather, leaving it hanging off the back of the hook approximately one shank-length.  Clip the excess about an eighth of an inch behind the eye and bind the feather to the top of the hook shank.  Finish with your thread at the rear of the shank. Then tie in the Polar Chenille opposite a spot between the hook point and the barb, and wrap your thread forward nearly to the eye.  Palmer the Polar Chenille forward, taking care not to bind any of the pieces to the shank.  Once behind the eye secure the material with a few tight wraps of thread, then clip the excess.

STEP TWO:  Make a marabou veil over the back hook.   Prepare the marabou feather by coming down from the tip and trimming  out the top by clipping the center stem at the point where the fibers are long enough to reach past the Polar Chenille once wrapped. To form the veil, hold the marabou on top of the hook shank and use the thread tension to spin the marabou, similar to the way you spin deer hair.  Once the marabou is all the way around the hook shank, carefully trim the butt pieces behind the eye and make a few wraps over them, advancing your thread to just behind the eye of the hook.

STEP THREE: Take a pinch of Arctic fox tail and tie it in with the tips hanging out over the eye of the back hook. Use your thumb to reverse the Arctic fox tail back over the rear hook and then bind it down on top of the shank with a half dozen wraps, creating a tidy bullet-shape.  Whip finish over those wraps and the back hook is complete.

STEP FOUR:  To connect the rear hook to the front hook, use a four-inch piece of 19-strand, .018″ Beadalon, with a few beads to close the gap.  Place the front hook in the vise and secure it with crossing wraps up and down the shank of the hook.  Make sure that the loop is vertical in the back once bound down so the rear hook will have unimpeded movement.

STEP FIVE:  Wrap the thread forward about one third of the hook shank and then add the marabou for the mid-body section.  Take two fluffy marabou feathers and hold them on top of the hook shank, then use the thread tension to help spin them to encircle the shank (similar to the way you formed the veil on the rear hook).  Once the marabou is spun around the shank make a few security wraps before trimming the excess, then wrap over the butt sections.  Figure-eight a set of dumbell eyes on the underside of the hook shank.  The front edge of the eyes should be just back of the eye of the hook.

STEP SIX:  To give the front hook bulk, hollow-tie a fox tail collar.  At about mid-shank take a clump of lighter coloured Arctic fox tail and spin it around the hook shank, with the tips out over the eyes.  Once spun in place work your thread through and make a few wraps at the base of the hair, then advance your thread about to the rear of the dumbbell eyes.  Just behind the eyes spin in a second, darker clump of Arctic fox tail, hollow-tied as you did with the first clump.

STEP SEVEN:  To create the head of the fly, clump-tie in four stacks of dark tan Senyo Laser Dub.  Tie in one stack on top of the hook shank just behind the eyes, then one on the bottom of the shank.  Then tie in a stack on the bottom of the shank in front of the eyes and finish with one more stack on top of the shank in front of the eyes.  Pull all the Laser Dub back out of the way and whip finish right at the eye of the hook.

STEP EIGHT:  To finish the head of the fly, make two cuts.  Hold the Laser Dub vertical and make one cut from the eye of the hook on a downward angle just below the dumbbell eyes, and then make the final cut from the eye of the hook on an upward angle just above those eyes.  The result is a wide wedge-cut head that pushes water and makes the fly move well when retrieved.

Friday Fly by…Skip Morris

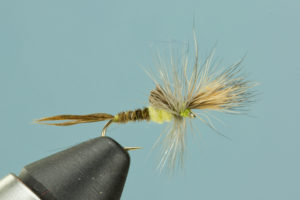
Every fly angler who’s ever cast to a persnickety trout knows you can never have too many mayfly patterns, so here’s a proven performer just in case you find yourself at your bench this weekend.

Morris May Light Recipe (by Skip Morris)

HOOK: Light wire standard length to 1X long, sizes 20 to 10.

THREAD: Tan 8/0.

TAIL-SHUCK: Tan Anton yarn (or any shiny yarn).

ABDOMEN: Buoyant tan dubbing (Superfine Dry Fly, Fly-Rite poly dubbing…).

WING: Gray poly yarn.

HACKLE: One, ginger or barred ginger.

THORAX: The same dubbing as in the abdomen.

Tying Instructions:

  1. Start the thread about three quarters up the shank. Bind a thin section of shuck-yarn atop the shank; bind the yarn down the shank to the bend. Trim off the front stub-end of the yarn. (Or make split hackle-fiber tails around a tight ball of thread-turns at the bend.)
  2. Dub a slim, slightly tapered abdomen from the bend to slightly past halfway up the shank.
  3. Double a thin section of poly yarn over the thread, slide the loop of yarn down atop the shank directly in front of the abdomen, and bind it tightly with a few tight turns of thread.
  4. Draw the ends of the yarn up and work a few turns of thread around the base of the yarn to gather the ends together. Give the yarn a hard push at its base to angle the yarn back.
  5. Use your hackle gauge to find a hackle of proper size for your hook. Strip the soft and overlong fibers from the base of the stem. Bind the hackle, by its bare stem, in front of the wing. Trim off the butt of the stem.
  6. Dub a rough, full thorax to just short of the hook’s eye.
  7. Spiral the hackle in four to six turns over the dubbed thorax to the eye. Build a tapered thread head, whip finish and cut the thread.
  8. Draw back the wing yarn, and then snip it to a squared end to a bit longer than the length of the shank. Trim the shuck-yarn. Trim the hackle fibres off beneath the thorax, either to flat or to angle down in a shallow “V.” Add head cement.